Recently, I posted an article about how to build a PDF and image compressor that is 100% privacy-friendly for users and with 0 ads of course, using Claude and deploying the project with Streamlit. In this article, I want to share a step-by-step guide on how to use Streamlit easily and how to deploy your project.
Why did I use Streamlit? First, because it’s free, easy to deploy via GitHub, and has the capability to use custom links, which makes it easier for you to create a unique and memorable link to share. For those of us who want to test deployment or see how our application can be accessed by others for free, Streamlit is a great option. Alright, without further ado, let’s get started on how to deploy a project using Streamlit.
First of all, you need to prepare your project using Python, because Streamlit only supports projects built with Python. After preparing your Python project, you need to create a GitHub account if you don’t already have one. You can register for GitHub here.
After that, prepare a new repository on GitHub. Inside it, create a project structure like this:
app.py
requirements.txt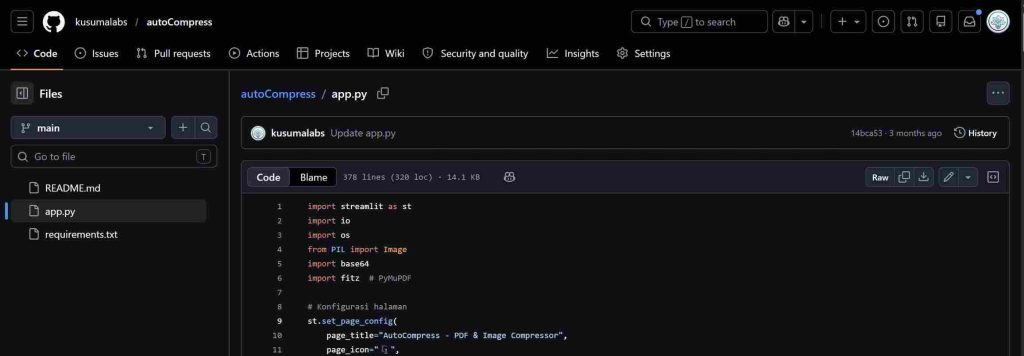
The structure above means that app.py contains the Python code of your project (the naming is flexible), and the second file requirements.txt contains the list of libraries you want to install along with their versions. For example, if your project uses Pillow, then your requirements.txt can look like this:
streamlit>=1.28.0
Pillow>=10.0.0
PyMuPDF>=1.23.0
In the example above, I used 3 libraries, where the required one is streamlit, and the other two are Pillow and PyMuPDF with specific versions. Here, you can also directly ask AI like Claude. Just type your project needs with a prompt like this:
“Create a project to count characters from text that I paste using Python and also generate requirements.txt for deployment on Streamlit platform”
So that’s an example of a prompt to generate a Streamlit-based project. After it’s generated by AI, open your GitHub repository, add a file named app.py or main.py (it’s up to you), then paste the script from AI into that file. After that, create another file named requirements.txt and fill it with the library requirements you got from your AI tool.
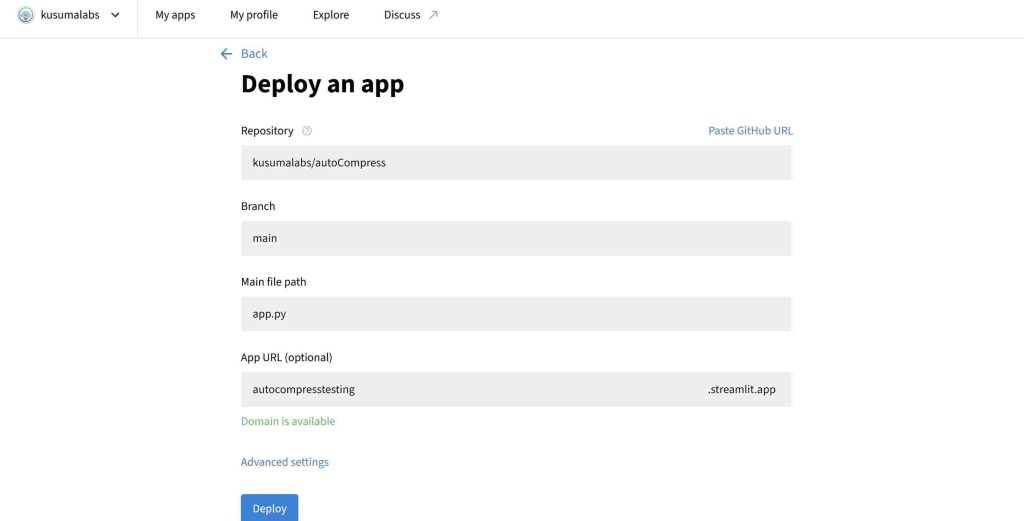
Once all files are ready, both Python and requirements, it’s time to create an account on Streamlit. You can create a Streamlit account here. You can sign in using Google or GitHub. If you want it faster, just use GitHub. If you use Google, you’ll need to connect your GitHub account to Streamlit. After everything is connected, go ahead and create a new app on Streamlit and paste your GitHub repository using the option “Deploy a Public Apps From GitHub”.
Fill in details like the file name and app name on Streamlit, which you can customize however you like. After that, click the deploy button and you will be redirected to the Streamlit page of your app. Wait for the build and deployment process to finish. And voila! Your project is successfully deployed on Streamlit. If you want to make changes, you can just edit the code in your GitHub repository.
There is one drawback in Streamlit, which is that every app that hasn’t been opened for some time will go into sleep mode to save resources. So the first time you open it again, there will be a message to wake up the app. So far, I personally don’t find this feature to be a problem, since it’s pretty simple to wake the app back up.
That’s all for this tutorial. Feel free to comment with your successfully deployed Streamlit projects. If you have any questions or want to share something, just leave a comment or email admin@kusumalabs.com — I’ll be happy to help. See you in the next article! 😁


Leave a Reply